How a Contractor Prepares a Fire Rebuild for Inspections, Phase by Phase
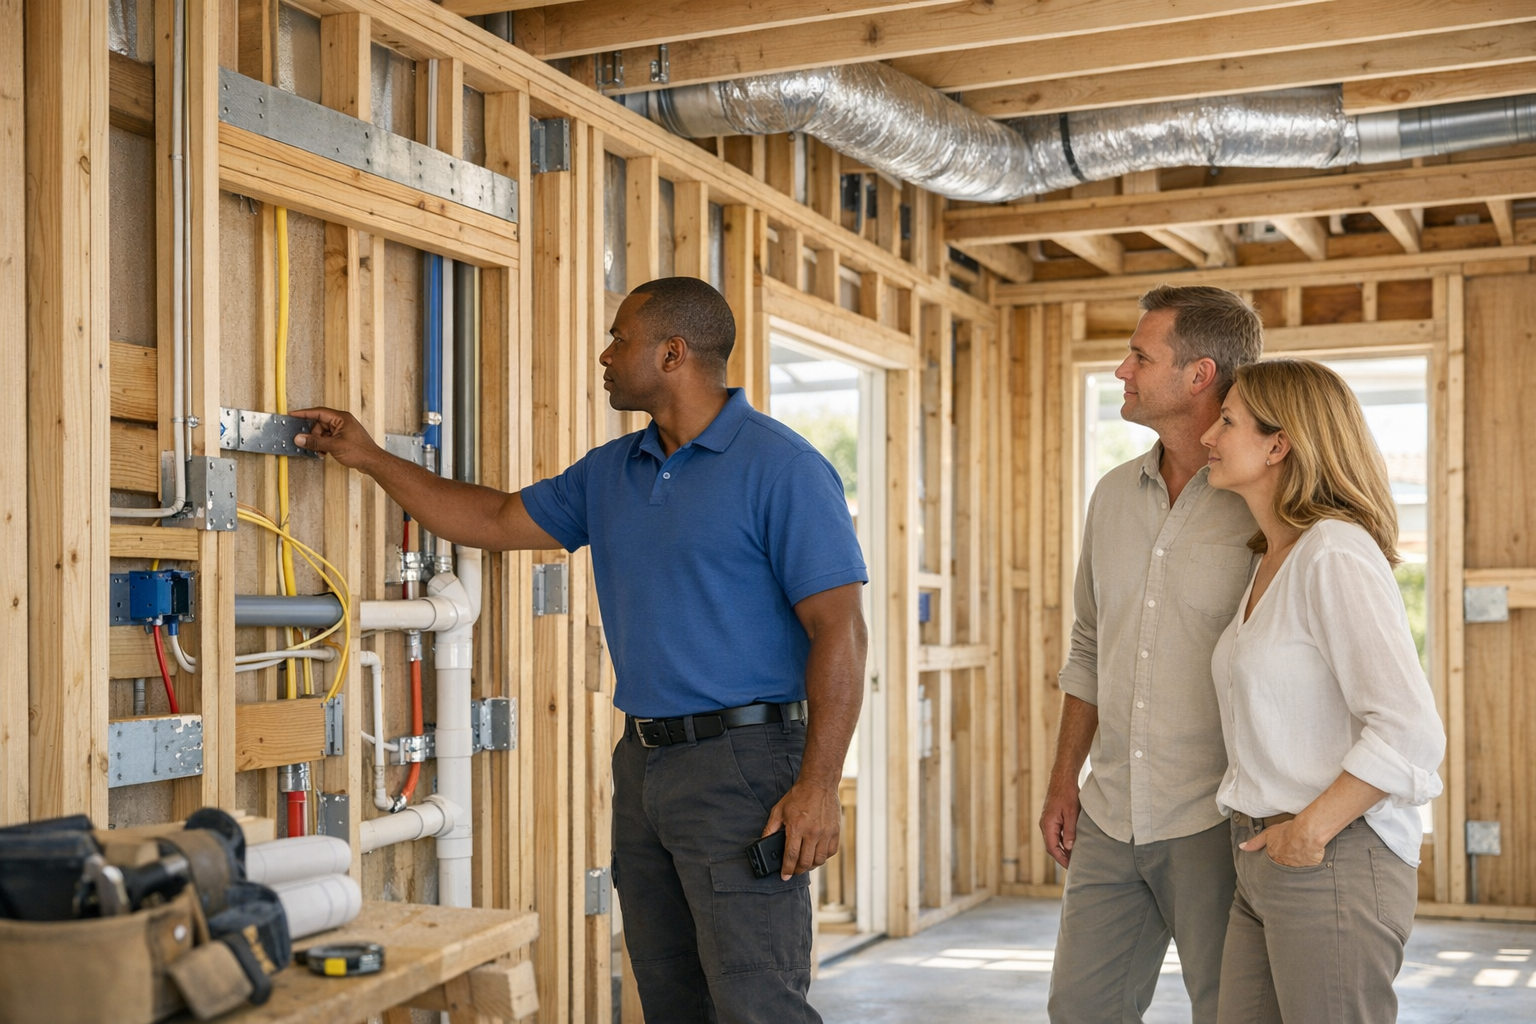
How a Contractor Prepares a Fire Rebuild for Inspections, Phase by Phase
A contractor prepares a fire rebuild for inspections by organizing approved plans and permits before work begins, sequencing every phase of construction so that each system is verified before it gets concealed, and coordinating subcontractors and documentation around each inspection milestone. The goal is straightforward: nothing gets covered up until it has been checked, documented, and approved.
If you are rebuilding a home in Altadena or Pacific Palisades after wildfire damage, the inspection process is one of the most important parts of the project. It is also one of the least understood. Most homeowners have never navigated a full rebuild inspection sequence, and most available information describes what inspections exist without explaining what a contractor actually does to prepare for each one.
This guide walks through the inspection preparation process phase by phase, from permits and site preparation through final sign-off, so you know what to expect, what questions to ask, and what competent inspection readiness looks like in practice.
Why Inspection Preparation Matters More Than Homeowners Realize
Building inspections exist to verify that the work behind your walls, under your floors, and above your ceilings was done correctly. Once drywall goes up, you cannot see framing connections, electrical wiring, plumbing runs, insulation placement, or fire-rated assemblies. The inspection process is the last opportunity to verify that concealed work meets the approved plans and applicable codes before it disappears from view.
For a fire rebuild, this matters even more than a typical construction project. The structure may have sustained damage that is not fully visible until demolition is underway. California building codes, including Title 24 energy requirements and fire-hardening provisions that apply in high fire hazard severity zones, add layers of compliance that must be verified at specific stages. A missed inspection or a failed inspection can delay a project by weeks, depending on what needs to be corrected and reinspected.
The contractor's job is not simply to schedule an inspection and hope it passes. The contractor's job is to prepare the work, verify it internally, and present it to the inspector in a condition that demonstrates compliance. That preparation is what this article is about.
Before the First Inspection: Permits, Plans, and Site Readiness
Inspection preparation begins before any construction work starts. The foundation of every inspection is the set of approved plans and the active building permit. Without these, no inspection can be scheduled or approved.
Securing and Posting the Required Permits
Before construction begins, the contractor verifies that all required permits have been issued by the local building department. For a fire rebuild in Los Angeles County, this typically includes a building permit and may include separate permits for electrical, plumbing, mechanical, and grading work depending on the scope. The active permit must be posted visibly at the jobsite before any inspector arrives.
Confirming Approved Plans Are On-Site and Current
The approved plan set is the reference document the inspector uses. The contractor must have a current, stamped set of approved plans on-site at all times. If any field conditions have changed from what the plans show, the contractor coordinates a plan revision submittal to the building department before proceeding past that phase. Inspectors compare the work to the approved plans, not to verbal agreements or change orders that have not been formally approved.
This is a detail that catches some projects off guard. In fire rebuilds, demolition frequently reveals conditions that differ from the original plans, such as structural damage that extends beyond the initial assessment or existing construction that does not match the original building records. When this happens, the contractor must stop, document the condition, coordinate with the engineer or architect, and submit revised plans for approval before the affected work can proceed and be inspected.
Hazardous Material Abatement Documentation
For homes built before 1978 in Altadena and Pacific Palisades, there may be lead-based paint, asbestos-containing materials, or other hazardous substances in the existing structure. California law requires proper abatement by licensed specialists before demolition proceeds. The contractor ensures that abatement is completed and documented before calling for any demolition or structural inspection. The inspector may request proof of abatement clearance before approving subsequent work.
Structural Stabilization and Site Safety
Before inspectors visit a fire-damaged property, the site must be safe to access. The contractor coordinates any necessary shoring, bracing, or temporary stabilization so that the structure is safe for both workers and inspectors. Debris removal, hazardous material clearance, and safe access paths are part of this preparation.
Demolition and Structural Exposure Inspection
Once permits are in place and the site is prepared, demolition exposes the existing structure so the full extent of fire damage can be assessed and verified against the engineering reports.
What Must Be Exposed and Visible
The contractor removes damaged materials in a controlled sequence, exposing structural elements so that the extent of damage can be compared to what the structural engineer documented. Framing members, connections, foundation elements, and any fire-affected structural components must be visible and accessible. The contractor does not cover or repair structural elements until the inspector and, when required, the structural engineer have verified the conditions.
Verifying Field Conditions Against Engineering Reports
Fire damage is not always predictable from the outside. A beam that looks intact may have lost structural capacity due to charring. A foundation that appears undamaged on the surface may have cracking that is only visible after debris is cleared. The contractor compares what demolition reveals to what the structural engineer's report describes. If the actual damage is more extensive than the report anticipated, the contractor coordinates with the engineer for updated recommendations before proceeding. This is documented with photographs and written records.
What Happens When Demolition Reveals More Damage Than Expected
This is common in fire rebuilds. The contractor's responsibility is to stop work in the affected area, document the conditions, notify the homeowner, coordinate with the engineer and architect, and submit any required plan revisions to the building department. Work in that area does not proceed until the revised scope is approved. Rushing past this step risks a failed inspection later and, more importantly, risks concealing structural deficiencies behind new finishes.
Framing Inspection Preparation
The framing inspection is one of the most critical checkpoints in a fire rebuild. It verifies that the structural skeleton of the home is built correctly before anything covers it up. A well-prepared framing inspection requires significant coordination and attention to detail from the contractor.
Structural Connectors, Fasteners, and Nailing Patterns
Before calling for a framing inspection, the contractor verifies that all structural connections match the engineer's approved details. This includes anchor bolts and sill plate connections to the foundation, hold-down hardware at shear walls, joist hangers at floor and roof framing, hurricane ties or seismic clips where specified, and shear wall nailing patterns. Each of these connections has specific requirements for size, spacing, and installation. The contractor walks the framing and verifies each connection before the inspector arrives.
Firestopping and Draft Stops
These are two distinct but related fire-safety requirements that inspectors check during the framing stage.
Firestopping refers to materials and assemblies installed at penetrations and gaps in fire-rated walls, floors, and ceilings to prevent fire and smoke from spreading through concealed spaces. Every pipe, duct, wire, and opening that passes through a fire-rated assembly must be properly firestopped.
Draft stops are barriers installed within concealed spaces, such as attics or floor cavities, to limit the movement of air and fire through those spaces. California building code requires draft stops at specific intervals and locations.
The contractor installs both before calling for the framing inspection and verifies that they are correctly placed, properly sized, and made of approved materials.
Fire Blocking at Floor and Ceiling Transitions
Fire blocking is required at specific points in wood-frame construction to slow fire spread within wall cavities, between floors, and at connections between walls and ceilings. The contractor installs fire blocking at all required locations and verifies placement before the inspection. Missing or improperly installed fire blocking is one of the more common correction items in framing inspections.
What the Inspector Looks For
During a framing inspection, the building inspector typically verifies that the framing matches the approved plans, that all structural connections are installed per the engineer's details, that fire blocking, firestopping, and draft stops are in place, that openings for windows and doors are correctly sized and supported, and that the framing is plumb, level, and properly braced. The inspector may also check for proper sheathing nailing and bracing at shear walls. The contractor's preparation work ensures that every item on this list is ready before the call is made.
Rough-In MEP Inspections: Electrical, Plumbing, and Mechanical
After framing is approved, the mechanical, electrical, and plumbing trades install their rough-in work. Each system requires its own inspection before walls can be closed. The contractor's coordination role during this phase is intensive.
Electrical Rough-In
The licensed electrician installs all wiring, boxes, panels, and circuits according to the approved electrical plans. Before the inspection, the contractor verifies that all wiring is properly supported, protected where it passes through framing, and installed with the correct wire sizes and circuit configurations. The electrical rough-in must be fully visible and accessible for the inspector. No insulation or drywall can cover any electrical work before this inspection is approved.
Plumbing Rough-In and Pressure Testing
The licensed plumber installs supply lines, drain lines, waste lines, and vent piping. Before the plumbing rough-in inspection, the contractor coordinates a pressure test of the supply system and may coordinate a water test or air test of the drain, waste, and vent system. A pressure test involves pressurizing the piping system and holding it for a specified period to verify there are no leaks. The test results must be available for the inspector. All piping must be visible and accessible during the inspection.
Mechanical Rough-In: HVAC Ductwork and Ventilation
The mechanical contractor installs ductwork, refrigerant lines, combustion air venting, and exhaust systems. Before the mechanical rough-in inspection, the contractor verifies that ductwork is properly supported, sealed at joints, and routed according to the approved plans. Combustion appliance venting and exhaust systems must meet clearance and material requirements. In California, mechanical systems are also subject to Title 24 energy compliance requirements, which the inspector may verify during this phase or during a separate energy inspection.
Coordinating Trade Sign-Offs Before Calling the Inspector
This is where the contractor's coordination role is most visible. Three licensed trades are working in the same wall and ceiling cavities. The contractor must sequence the work so that one trade does not damage or obstruct another trade's installation. Before calling for any rough-in inspection, the contractor walks the installation with the trade contractor to verify that the work is complete, accessible, and ready for inspection. This internal verification step, before the city inspector arrives, is one of the most important quality control practices in a well-managed rebuild.
The critical sequencing rule is simple: never cover work that is subject to an inspection that has not been completed and approved. This means no insulation goes in until all rough-in inspections pass. No drywall goes up until insulation inspection passes. Each phase gates the next.
Insulation and Energy Compliance Inspection
After all rough-in inspections are approved, insulation is installed and inspected before walls are closed.
Title 24 Energy Compliance in Rebuilt Assemblies
Title 24 is California's energy code. It sets requirements for insulation values, air sealing, window performance, lighting, and mechanical system efficiency. In a fire rebuild, the rebuilt portions of the home generally must meet current Title 24 requirements, not the standards that applied when the home was originally built. This can mean higher insulation values, more efficient windows, updated HVAC equipment, and specific air-sealing details that were not part of the original construction.
The contractor coordinates Title 24 compliance documentation, which is typically prepared by an energy consultant and included in the approved plan set. Before calling for the insulation inspection, the contractor verifies that the installed insulation type, thickness, and placement match the Title 24 requirements shown on the approved plans. The inspector checks this during the insulation inspection.
Fire-Rated Assemblies and Type X Drywall Requirements
In areas where fire-rated wall or ceiling assemblies are required, such as garage-to-house separations or multi-story floor-ceiling assemblies, the contractor verifies that the correct insulation type is installed and that the assembly is ready to receive the specified drywall. Type X drywall is a fire-resistant gypsum board used in fire-rated assemblies. The contractor confirms that the correct drywall type is on-site and that the assembly will be completed according to the tested and listed configuration. Substitutions or deviations from the listed assembly can cause a failed inspection.
Photographing Before Walls Are Closed
Before insulation and drywall cover the framing, wiring, plumbing, and ductwork permanently, the contractor photographs the completed rough-in work in every wall, ceiling, and floor cavity. These photographs become part of the project documentation and serve multiple purposes: they verify the as-built conditions, provide a record for insurance documentation, and give the homeowner a permanent reference of what is behind the finished surfaces. This step is not required by code, but it is a quality control practice that protects both the homeowner and the contractor.
Exterior and Weatherproofing Inspection
Exterior work has its own inspection requirements, and in Altadena and Pacific Palisades, fire-hardening requirements add a layer of compliance that does not apply in every jurisdiction.
Roof, Flashing, and Weather-Resistive Barriers
Before the exterior is finished, the contractor prepares the roof sheathing, flashing details, and weather-resistive barrier for inspection. The inspector verifies that flashing is properly installed at roof-to-wall transitions, around windows and doors, at penetrations, and at valleys and ridges. The weather-resistive barrier must be installed correctly over the sheathing and integrated with the flashing system to prevent water intrusion. Poor flashing and waterproofing are among the most consequential defects in any rebuild because the damage they cause is hidden until it becomes severe.
WUI-Compliant Exterior Materials in High Fire Hazard Severity Zones
Properties in Altadena and Pacific Palisades may fall within designated High Fire Hazard Severity Zones or Wildland-Urban Interface (WUI) areas. In these zones, California building code imposes specific requirements for exterior materials, including roofing, siding, eaves, vents, windows, and decking. These materials must meet fire-resistance ratings and ignition-resistance standards designed to reduce the risk of ember intrusion and radiant heat ignition during a wildfire.
The contractor verifies that all specified exterior materials are correctly installed and that product documentation, such as fire-rating certifications and manufacturer compliance letters, is available for the inspector. Using non-compliant materials in a fire hazard zone will result in a failed inspection and required replacement.
Windows, Doors, and Water Management Details
Window and door installations are inspected for correct flashing integration, proper sizing per the approved plans, and compliance with any fire-resistance requirements that apply in the project's fire hazard zone. The contractor checks that each opening is properly flashed, sealed, and installed according to the manufacturer's instructions and the approved details before calling for the inspection.
Final Inspection and Certificate of Occupancy
The final inspection is the last step before the building department issues a Certificate of Occupancy (CO), which confirms that the rebuilt home is safe to occupy and that all permitted work has been completed and approved.
Life-Safety Systems
Before the final inspection, the contractor verifies that all life-safety systems are installed and operational. This includes smoke alarms in every required location, carbon monoxide detectors where required, proper egress from bedrooms and habitable spaces, handrails and guardrails at stairs and elevated surfaces, and any required fire sprinkler system if the project scope triggered that requirement. These items are checked during the final inspection, and any deficiency will prevent the CO from being issued.
Completing All Trade Finals
Each trade, including electrical, plumbing, and mechanical, typically requires a final inspection in addition to the rough-in inspection. The electrical final verifies that all fixtures, switches, outlets, panels, and devices are installed and operational. The plumbing final verifies that all fixtures are connected and functional. The mechanical final verifies that the HVAC system is operational and that combustion appliances vent correctly. The contractor coordinates these trade finals so they are completed before or concurrent with the building final.
Resolving All Corrections Before the Final Sign-Off
If any inspection during the project resulted in correction items, those corrections must be resolved and reinspected before the final can be approved. The contractor tracks every correction item from every inspection phase, assigns responsibility to the appropriate trade, verifies the correction is completed, and schedules the reinspection. Unresolved corrections from earlier phases will block the final sign-off.
A Certificate of Occupancy is issued when all inspections have been approved, all corrections have been resolved, and the building department confirms that the home meets all applicable codes for occupancy. This is the document that confirms the rebuild is officially complete from a code-compliance standpoint.
The Pre-Inspection Walkthrough: What the Contractor Does the Day Before
One of the most important and least-discussed practices in inspection preparation is the pre-inspection walkthrough. This is the contractor's internal quality check, performed before the city inspector is called.
During a pre-inspection walkthrough, the contractor or site superintendent walks the area that will be inspected and verifies every item the inspector will check. For a framing inspection, that means walking every wall, verifying every connector, checking every nailing pattern, and confirming that fire blocking and draft stops are in place. For a rough-in inspection, that means checking every pipe, wire, and duct run against the approved plans.
The walkthrough also verifies practical readiness:
- Are the approved plans on-site and accessible?
- Is the permit posted and visible?
- Is the area clean, safe, and accessible for the inspector?
- Are all required test results, documentation, and certifications available?
- Has the work been photographed for project documentation?
- Are there any items that need correction before the inspector arrives?
If the walkthrough reveals items that are not ready, the contractor addresses them before scheduling the inspection. This prevents failed inspections, avoids reinspection delays, and keeps the project on schedule. It is a discipline, not a formality.
What Happens If an Inspection Fails
Inspection failures happen. A responsible contractor treats them as part of the process, not as a crisis.
When an inspection results in correction items, the inspector documents what needs to be addressed. The contractor reviews the correction notice, assigns the correction to the responsible trade contractor, sets a timeline for completion, and schedules a reinspection once the work is done. The homeowner should expect to be informed about what was noted, what is being corrected, and when the reinspection is expected.
Common correction items include minor nailing pattern adjustments, a missing fire block, a support bracket that needs repositioning, or a test that needs to be repeated. These are usually resolved quickly when the contractor has a system for tracking and assigning them. More significant corrections, such as a structural connection that does not match the approved details, may require coordination with the engineer and a longer resolution timeline.
The key question is not whether corrections ever occur. The key question is whether the contractor has a system to track them, assign them, resolve them, verify the correction, and close them out with a passing reinspection. That system is what separates a controlled construction operation from a reactive one.
Documentation Throughout the Inspection Process
Every inspection generates documentation, and a well-managed rebuild maintains a complete record of the entire inspection sequence.
The documentation a homeowner should expect from a professional fire rebuild includes:
- Approved plan sets with any revision stamps
- Permit records showing all active and finalized permits
- Inspection records showing the date, type, result, and any correction items for each inspection
- Photographs of concealed work before cover-up at each phase
- Test results such as plumbing pressure tests, electrical testing, and any required special inspection reports
- Material certifications for fire-rated, WUI-compliant, or structurally specified products
- Correction tracking records showing how each correction was resolved
- Certificate of Occupancy upon final approval
This documentation serves the homeowner in multiple ways. It provides a permanent record of what was built and how it was verified. It supports insurance documentation requirements. And it gives the homeowner confidence that the work behind the finished surfaces was checked, approved, and recorded.
How Insurance Documentation Differs from Building Inspections
Homeowners in fire rebuild situations often navigate both building department inspections and insurance documentation requirements at the same time. These are two separate processes with different purposes, and understanding the difference helps reduce confusion.
Building department inspections verify that the construction work meets applicable building codes and matches the approved plans. The building inspector works for the local jurisdiction and is focused on code compliance and life safety.
Insurance documentation tracks the scope, cost, and progress of the rebuild for the insurance carrier. The insurance company may send adjusters, consultants, or third-party inspectors to verify that the work being performed matches what was approved in the claim and that costs align with the agreed scope.
The contractor may coordinate with both processes, but they operate independently. A passed building inspection does not automatically satisfy an insurance documentation requirement, and insurance approval does not replace a building inspection. A well-organized contractor maintains documentation that serves both needs without conflating them.
How 1st Choice Development Manages Inspection Preparation
At 1st Choice Development, inspection preparation is built into the way every fire rebuild is managed. It is not a separate step added at the end of each phase. It is part of the project control system that runs from pre-construction through final handoff.
Every phase of a rebuild managed by 1st Choice Development follows the same discipline: the work is planned against the approved documents, executed by coordinated trades, verified internally through a pre-inspection walkthrough, photographed and documented before anything is concealed, and then presented for official inspection. Correction items are tracked, assigned, resolved, and reinspected before the project moves forward.
This approach reflects how 1st Choice Development manages rebuilds as a controlled construction operation. Design, field management, documentation, scheduling, trade coordination, and inspection readiness are handled as one accountable process, not as separate responsibilities scattered across disconnected parties.
For homeowners in Altadena and Pacific Palisades who are navigating a fire rebuild, this means having one point of accountability for the work behind the walls, the documentation that proves it was done right, and the inspection results that confirm it.
Frequently Asked Questions
What inspections are typically required for a fire rebuild in California?
A fire rebuild generally requires inspections at multiple stages, including foundation, framing, rough electrical, rough plumbing, rough mechanical, insulation and energy compliance, drywall or lath, exterior weatherproofing, and a final inspection before the Certificate of Occupancy is issued. The specific inspections required depend on the scope of work, the approved plans, and the local building department's requirements. Your contractor and building department can confirm the exact inspection sequence for your project.
Can work be covered before an inspection is approved?
No. Any work that is subject to inspection must stay fully exposed and accessible until the inspector has reviewed and approved it. Covering work before inspection is complete, such as installing drywall over wiring or plumbing that has not yet been inspected, can result in a requirement to open up the finished surfaces so the inspector can evaluate what is behind them. This creates delays and adds cost to the project. A well-managed rebuild sequences every phase so that each inspection is completed and approved before the following phase begins.
What happens if an inspection fails during a fire rebuild?
The inspector documents the items that need correction. The contractor reviews the corrections, assigns them to the responsible trade, completes the work, and schedules a reinspection. Most correction items are resolved within a short period. More significant corrections may require coordination with the engineer or architect. Your contractor should communicate clearly about what was noted, what is being done, and when the reinspection is expected.
Does a fire rebuild have to meet current building codes?
Generally, yes. When a home is substantially rebuilt, the new construction typically must comply with the current California Building Code, including current Title 24 energy requirements and any fire-hardening provisions that apply in the property's fire hazard severity zone. This may mean higher standards than the original home was built to. Your building department and design professional can confirm which code editions and requirements apply to your specific project.
Who checks the work before the building inspector arrives?
In a well-managed project, the contractor or site superintendent performs an internal pre-inspection walkthrough before calling for the official inspection. This walkthrough verifies that the work is complete, matches the approved plans, and is ready for the inspector. The purpose is to catch and correct any issues before the official inspection, which reduces the risk of failed inspections and keeps the project on schedule.
What documents should I expect to receive during and after the rebuild?
You should expect to receive copies of permits, approved plans, inspection records, photographs of concealed work, test results, material certifications for specified products, correction tracking records, warranty information, and the Certificate of Occupancy. The specific documentation may vary by project, but a professional contractor maintains these records and provides them to the homeowner as part of the project closeout.
Do I need a structural engineer for a fire rebuild?
In most fire rebuilds involving structural damage, a licensed structural engineer is involved in assessing the damage, designing the structural repairs, and providing the engineering details that the contractor builds to and the inspector verifies. Whether a structural engineer is required depends on the extent of the damage and the building department's requirements. Your contractor and building department can advise on whether a structural engineer is needed for your project.
Conclusion
Inspection preparation in a fire rebuild is not a single event. It is a discipline that runs through every phase of the project, from the moment permits are secured through the day the Certificate of Occupancy is issued. The contractor's role is to plan, coordinate, verify, document, and present the work at each stage so that every system, connection, and assembly is confirmed before it disappears behind finished surfaces.
For homeowners in Altadena and Pacific Palisades, understanding this process helps you recognize what professional rebuild management looks like and what questions to ask along the way. The quality of your rebuilt home depends not just on the finishes you can see, but on the work behind the walls that was verified, inspected, and documented while it was still visible.
If you are planning a fire rebuild and want to understand how 1st Choice Development manages inspection readiness as part of a controlled rebuild process, schedule a rebuild consultation at 1stchoicedevelopment.com.
Questions about your rebuild?
We rebuild fire-damaged homes across Altadena and Pacific Palisades, and we are happy to talk through your situation.
Talk to us