How to Verify Construction Quality Before Walls Are Closed in a Fire Damage Rebuild
How to Verify Construction Quality Before Walls Are Closed in a Fire Damage Rebuild
The pre-drywall phase — the window after rough-in work is complete but before insulation and drywall go up — is the only practical opportunity to confirm that concealed construction work was done correctly. Once walls are closed, framing, plumbing, electrical wiring, HVAC ductwork, waterproofing details, and structural connections disappear behind finishes. If something was missed or executed incorrectly, uncovering it later typically means destructive tear-out, added cost, and significant lost time.
For homeowners in Altadena or Pacific Palisades rebuilding after wildfire, this phase carries particular weight. The rebuild is complex. The stakes are personal. And the work concealed behind the walls is what determines whether the finished home performs safely and durably for decades — not simply whether it looks right on move-in day.
This guide explains what gets verified before walls close, in what sequence, who performs each check, what to document, and which conditions should halt the process until corrections are resolved.
Why the Pre-Cover Window Is the Most Important Quality Checkpoint in a Rebuild
Every reconstruction project follows a defined sequence. Site preparation leads to foundation work, which leads to framing, which leads to rough mechanical, electrical, and plumbing installation — commonly referred to as rough MEP. After rough MEP is complete and inspected, insulation is installed, and then drywall closes the walls.
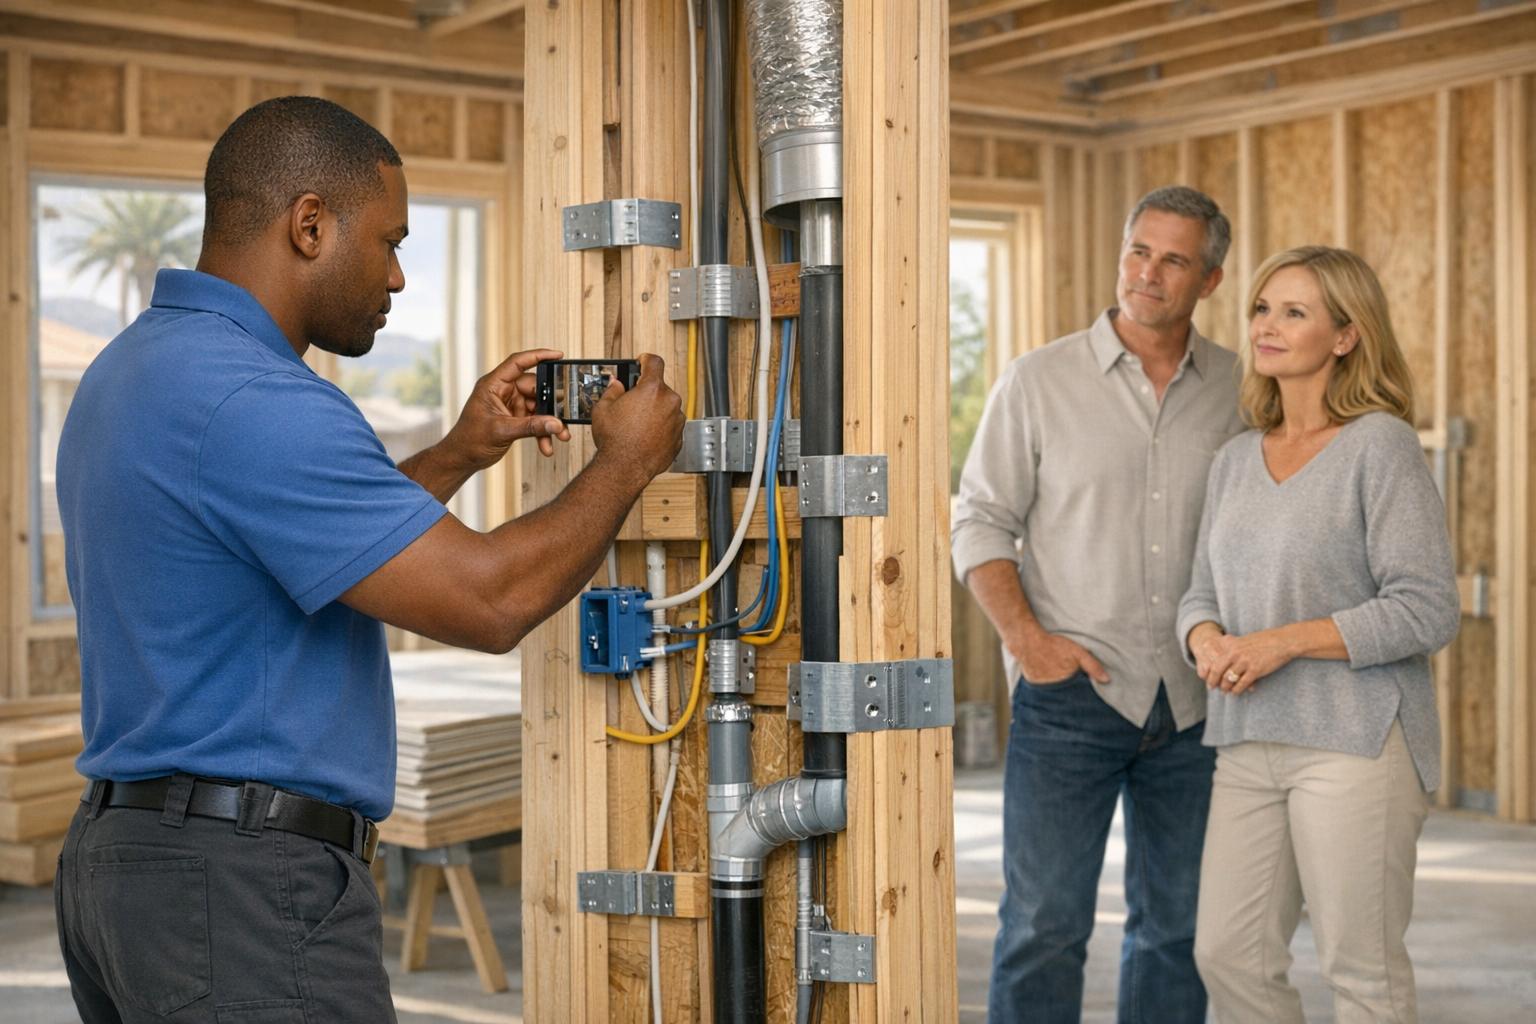
The interval between completed rough-ins and drywall installation is the pre-cover window. During this phase, every concealed system remains visible and accessible. Framing connections, pipe routing, wire paths, duct sealing, waterproofing layers, fireblocking, nail plates, and structural hardware — all of it can be seen, photographed, tested, and corrected before it is permanently enclosed.
Once drywall is hung, that access is gone. Deficiencies identified at the pre-cover stage can be addressed without significant disruption. The same deficiencies discovered after walls are closed typically require cutting open finished surfaces, removing insulation, and redoing work that was already considered complete — adding cost, extending the schedule, and creating avoidable setbacks.
In a fire damage rebuild, the pre-cover phase carries additional significance because the project frequently involves structural reconstruction, new utility runs, updated code requirements, and coordination across multiple trades working within a compressed timeline. The greater the complexity of the project, the more consequential this checkpoint becomes.
The Correct Inspection Sequence Before Walls Close
The order in which systems are verified is not arbitrary. Each trade needs to be reviewed before the next trade's work obscures or limits access to what came before. Moving ahead out of sequence creates gaps that become difficult or impossible to close later.
The general verification sequence in a fire damage rebuild is:
- Structural framing — reviewed before rough MEP begins, because plumbing, electrical, and HVAC installations penetrate and attach to the framing
- Plumbing rough-in — supply lines, drain-waste-vent piping, and waterproofing details verified and pressure-tested
- Electrical rough-in — wiring, boxes, grounding, and panel work reviewed
- HVAC and ductwork — duct routing, sealing, support, and penetrations confirmed
- Building envelope and moisture protection — flashing, weather-resistive barriers, and air sealing reviewed
- Insulation and air sealing — insulation type, thickness, coverage, and California Title 24 energy compliance confirmed before drywall is installed
Each step depends on the one preceding it. If framing has problems — misaligned studs, missing structural hardware, unapproved notches or holes — those problems carry forward into every trade that follows. This is why sequence matters, and why a well-managed rebuild treats the pre-cover phase as a controlled process rather than a loosely coordinated series of independent checks.
What to Verify in Each Trade System
Structural Framing
Framing is the structural foundation of the house. In a fire rebuild, much or all of the framing may be entirely new construction, which means it should correspond precisely to the approved structural plans.
- Stud spacing, plumb, and alignment — studs should be positioned at the spacing shown on plans, plumb, and aligned so that finishes and sheathing attach correctly
- Headers over doors and windows — properly sized headers carry the load above openings and must conform to the structural engineer's specifications
- Load-bearing connections — hold-downs, anchor bolts, straps, and tie-downs link the framing to the foundation and transfer loads through the structure, a detail that is especially significant in California seismic and fire zones
- Shear wall nailing — shear walls resist lateral forces from wind and seismic activity, and the nailing pattern and schedule must align exactly with the approved plans
- Fireblocking and draftstopping — blocking placed in wall cavities, soffits, and chase openings to limit the movement of fire and smoke through concealed spaces
- Damaged or compromised members — split, cracked, excessively notched, or improperly drilled framing members should be flagged and corrected before any trade work is installed around them
- Plan compliance — any framing changes from the approved plans should carry written approval from the engineer or architect of record and be reflected in the permit file
Shear wall verification and structural hardware review are particularly important in California, where seismic design requirements and wildfire-urban-interface construction standards introduce layers of structural detail not present in many other states. These elements are not visible once drywall is in place, and their correct installation cannot be confirmed by examining a finished wall.
Plumbing Rough-In
Plumbing rough-in encompasses all supply lines, drain-waste-vent (DWV) piping, and waterproofing installations that will be enclosed inside walls, floors, and ceilings.
- Pipe materials and support — pipes should be the correct material for the application, supported at required intervals, and secured to prevent movement over time
- Drain slope — horizontal drain lines typically require a minimum slope of one-quarter inch per foot to drain reliably; inadequate slope contributes to slow drainage, clogs, and long-term performance problems
- Nail plates — where pipes pass through framing members within one and one-quarter inches of the face of the stud, a protective steel nail plate must be installed to guard against puncture by drywall fasteners
- Venting and cleanouts — the DWV system requires correctly configured venting to function properly, and cleanout access must be provided wherever required by code
- Pressure test — before walls close, the plumbing system is pressure-tested to confirm there are no leaks in supply or drain lines; the test uses air or water held at a specified pressure for a defined duration, and the system must maintain pressure throughout
- Shower pan and waterproofing — in areas where waterproofing is applied prior to tile installation, a flood test may be required to verify the waterproofing layer is intact before finish materials go on top
A pressure test that is skipped or performed hastily can allow a slow leak to develop behind finished walls — among the most damaging and costly failures in residential construction.
Electrical Rough-In
Electrical rough-in covers all wiring, boxes, grounding, and panel connections installed before walls are enclosed.
- Wire routing — wires should pass through the center of bored holes in framing members rather than notches cut at the edge of studs, protecting them from damage during drywall installation
- Nail plates — where wires run within one and one-quarter inches of the face of a framing member, a protective steel plate is required
- Box placement and fill — outlet and switch boxes should be positioned at the correct height, in the locations shown on the plans, and not overfilled with conductors
- Grounding and bonding — the system must be properly grounded and bonded in accordance with applicable code
- Circuit arrangement — circuits should correspond to the approved electrical plans, including any dedicated circuits required by code or the project specifications
- Required municipal inspection — electrical rough-in is among the inspections that must receive building department approval before walls can be closed; this step is not discretionary
Electrical deficiencies concealed behind finished walls can create safety hazards that remain invisible until they produce a problem. This is why the building department requires a separate electrical rough-in inspection before any cover-up work proceeds.
HVAC and Ductwork
HVAC rough-in includes ductwork, equipment rough placement, refrigerant lines, condensate drainage, and combustion air provisions.
- Duct sizing and support — ducts should be sized in accordance with the mechanical plans and properly supported to prevent sagging or disconnection over time
- Duct sealing — joints and connections should be sealed with mastic or approved metal foil tape; cloth duct tape deteriorates over time and does not provide a reliable long-term seal
- Insulation — ducts routed through unconditioned spaces such as attics must be insulated to the level required under California's Title 24 energy code
- Condensate drainage — condensate lines must drain effectively and terminate at an approved location
- Penetrations through framing — duct penetrations through structural framing members must not compromise structural integrity; oversized holes or cuts warrant review
- Exhaust duct routing — bathroom fans, range hoods, and dryer vents must discharge to the exterior, not terminate inside an attic or wall cavity
In California, duct leakage testing may be required as part of Title 24 energy compliance verification. This testing typically occurs before or during the pre-cover phase and is recorded as part of the energy compliance documentation.
Building Envelope and Moisture Protection
The building envelope is the barrier between conditioned interior space and the exterior environment. In a fire rebuild where exterior walls, windows, doors, and roofing are being reconstructed, envelope details carry significant consequences for long-term performance.
- Window and door flashing — flashing around openings must be installed correctly, with proper lapping and integration into the weather-resistive barrier, to prevent water from entering the wall assembly
- Weather-resistive barrier (WRB) — the WRB is the layer behind the exterior cladding that directs water away from the framing; it must be installed with correct overlaps, sealed at penetrations, and continuous across the wall surface
- Roof-to-wall transitions — where the roof plane meets a wall, step flashing and kick-out flashing must be correctly positioned to direct water away from the wall assembly
- Exterior penetrations — any penetration through the exterior wall — pipes, conduits, vents, utility meters — must be sealed and flashed to block water entry
- Wet or damaged framing — framing that is visibly wet, discolored, or showing early signs of deterioration must be addressed before being enclosed; sealing wet framing behind insulation and drywall traps moisture and leads to rot, mold, and structural degradation
Moisture management during reconstruction is particularly relevant in fire rebuilds where the structure may have been exposed to weather across extended demolition and framing phases. Any moisture-related concerns need to be resolved before walls are closed.
Insulation and Air Sealing
Insulation is typically among the final installations before drywall. It must be reviewed for type, thickness, coverage, and compliance with the project's energy requirements.
- Insulation type and R-value — the insulation must match the specifications in the approved plans and satisfy the R-value requirements for the applicable climate zone
- Coverage and installation quality — gaps, compression, voids, and improperly fitted batts all reduce thermal performance; insulation should fill each cavity completely without being compressed or leaving air channels
- California Title 24 energy code — California requires energy compliance documentation, including insulation verification, as part of the permit process; an energy consultant or HERS rater may need to confirm insulation installation before drywall proceeds
- Air sealing — gaps around framing members, at top and bottom plates, around penetrations, and at transitions between assemblies should be sealed to limit air leakage; in some projects, a blower door test may be required before drywall to verify air barrier continuity
Title 24 compliance is a mandatory requirement in California. The insulation and air sealing review at this stage is part of the documented energy compliance pathway and must be completed before walls are enclosed.
Municipal Inspections Versus Independent Quality Inspections
Many homeowners assume that a building department approval of rough-in work confirms that everything behind the walls is correct. That assumption is worth examining more carefully.
A municipal rough-in inspection verifies code compliance. The building department inspector confirms that the work satisfies minimum code requirements — correct wire sizing, proper pipe materials, structural hardware in place, required fireblocking installed. Municipal inspector approval is a required milestone before walls can be closed, and it is recorded on the permit card.
A contractor's internal quality walkthrough or an independent pre-drywall inspection serves a different function. This review focuses on workmanship, plan compliance, trade coordination, and construction quality beyond the minimum code threshold. It may surface issues that are technically code-compliant but still reflect poor practice — a drain line sloped at the minimum allowable grade rather than an optimal one, insulation that is present but poorly fitted, or framing that is plumb but carries unnecessary notches that reduce its capacity.
Both serve distinct purposes. A passed municipal inspection indicates the work met code minimums. A thorough quality walkthrough indicates the work was executed well. In a fire rebuild — where the homeowner has already experienced a significant loss and wants confidence that the reconstruction is sound — both matter.
Some homeowners also choose to engage a third-party inspector, such as a licensed home inspector or a specialty inspector, for an independent pre-drywall review. This provides an additional perspective that is not affiliated with either the builder or the building department. Whether this step makes sense depends on the complexity of the project, the homeowner's comfort level, and the nature of the working relationship with the contractor. It is always an option worth raising.
How to Document Hidden Work Before It Disappears
Photographic documentation of concealed work is among the most useful records a homeowner can hold after walls close. It requires minimal effort to create and is essentially impossible to reconstruct once the opportunity has passed.
What to Photograph
- Every wall cavity in every room — start with wide-angle shots for context, then capture close-ups of specific details
- Structural hardware, hold-downs, straps, and anchor bolts
- Shear wall nailing patterns
- Plumbing supply and drain routing, including valve and cleanout locations
- Electrical wire paths, box locations, and panel connections
- HVAC duct routing and connections
- Waterproofing and flashing details at windows, doors, and exterior penetrations
- Fireblocking locations
- Insulation installation before drywall covers it
- Any areas where corrections were made following an inspection or walkthrough
Include a tape measure, ruler, or other scale reference in close-up photographs so that dimensions remain interpretable later. Record the date on every image.
How to Organize Documentation
Sort photographs by room and by trade. Label each set with enough specificity to be useful later — a label such as "Kitchen north wall, plumbing rough-in, [date]" is far more functional than an unsorted collection of hundreds of images. Maintain digital copies in at least two separate locations.
Why This Matters
This documentation serves several practical purposes. When a future repair requires opening a wall, the photographs show exactly where pipes, wires, and ducts are located — helping prevent accidental damage during the work. If a warranty question arises, the images confirm what was installed and when. For homeowners managing active insurance claims while rebuilding after fire damage, this documentation may also support the claim file by providing a clear, timestamped record of the reconstruction at each phase.
Documentation created during the pre-cover phase is a lasting reference. The effort involved is minimal. The value it provides across the life of the home is substantial.
Red Flags That Should Stop Wall Closure
Certain conditions warrant halting the process until they are corrected and re-confirmed. These are not matters of preference — they are indicators that something requires resolution before it becomes inaccessible behind finished surfaces.
- Structural members cut, drilled, or notched without plan approval — any modification to structural framing not shown on the approved plans requires review by the structural engineer before the work proceeds
- Missing nail plates — where plumbing or wiring passes near the face of a framing member, absent nail plates create a direct puncture risk when drywall fasteners are driven
- Missing or incomplete fireblocking — unsealed cavities between floors, at soffits, and around chase openings allow fire and smoke to travel through concealed spaces
- Wet or deteriorating framing — wood that is visibly wet, stained, or showing early signs of mold should not be covered with insulation and drywall until the condition is evaluated and resolved
- Incomplete or improperly installed flashing and waterproofing — gaps in the building envelope create pathways for water intrusion that causes damage behind finished surfaces
- Failed pressure tests — a plumbing system that does not hold pressure contains a leak that must be located and repaired before cover-up
- Unresolved inspection corrections — if the building department inspector identified required corrections during a rough-in inspection, those items must be completed and re-inspected before the project advances
- Undocumented changes to approved plans — any deviation from the permitted plans should be documented and processed through the appropriate approval channel before the affected work is enclosed
What to Do When a Red Flag Is Found
The correction process follows a clear logic: identify the issue, record it in writing, correct it, and confirm the correction before moving forward. In practice, a well-managed reconstruction project maintains a system for logging deficiencies, assigning responsibility to the appropriate trade, verifying that the correction was made, and documenting that the item is closed.
Corrections at the pre-cover stage are a normal part of construction. They occur on well-run projects. What distinguishes a disciplined process is whether the project team has the structure to catch them, track them, and close them out — rather than allowing them to be buried when drywall goes up before anyone looked carefully enough.
How 1st Choice Development Manages Pre-Cover Quality in a Fire Rebuild
At 1st Choice Development, the pre-cover phase functions as a defined checkpoint within a structured construction process — not as an informal step that relies on individual subcontractors to self-verify their own work.
The company coordinates the review sequence across trades, schedules municipal inspections with the local building department in Altadena or Pacific Palisades as applicable, and conducts internal quality walkthroughs before those inspections are requested. By the time the building department inspector arrives, the work has already been reviewed internally for plan compliance, workmanship quality, and trade coordination.
Jobsite documentation — including photographic records of concealed work at each phase — is part of the standard project workflow. This record supports the project file, assists with warranty tracking, and gives the homeowner a lasting reference for what is behind the walls.
When corrections are identified, they are logged, assigned, completed, and verified before the project moves forward. Subcontractor accountability is maintained through documented coordination rather than verbal assurances.
This approach does not remove every variable from a complex fire rebuild. Permits, inspections, material availability, subcontractor scheduling, and local building department timelines all involve external parties that no single contractor can fully control. But the pre-cover quality checkpoint is one of the areas where a structured process produces the most measurable benefit — because the work confirmed at this stage shapes how the home performs for the long term.
Frequently Asked Questions
Is a pre-drywall inspection required by code in California?
Municipal rough-in inspections — covering framing, electrical, plumbing, and mechanical work — are required by the building department before walls can be closed. These inspections are recorded on the permit card and must receive approval before the project advances to insulation and drywall. A separate independent pre-drywall inspection by a third party is not a code requirement, but it is an option some homeowners select for additional confidence in the work.
Do I need an independent inspector if the city already approved the rough-in?
A municipal inspection confirms that work meets code at a minimum threshold. An independent inspection can evaluate workmanship, plan compliance, and quality beyond that threshold. The two serve different functions, and neither replaces the other. Whether an independent inspection is appropriate depends on the project's complexity and the homeowner's level of confidence in the work being performed.
What is a nail plate and why does it matter?
A nail plate is a small steel plate fastened to the face of a stud at a location where a pipe or wire passes within one and one-quarter inches of the surface. Its function is to prevent a drywall screw or nail from puncturing the pipe or wire when drywall is installed. Missing nail plates are among the more common deficiencies identified at the pre-cover stage, and they are straightforward to install when caught before walls close.
What does a plumbing pressure test involve?
A pressure test introduces air or water into the plumbing system at a specified pressure and holds it for a set period. If the pressure falls, a leak exists somewhere in the system and must be located and repaired. This test is typically a building department requirement before the plumbing rough-in inspection can be approved.
What should I photograph before the walls close?
Capture every wall cavity, structural connection, plumbing route, electrical path, HVAC duct run, waterproofing detail, and fireblocking installation. Use wide-angle shots to establish context and close-ups to capture specific details. Include a scale reference in close-up images and record the date on every photograph. Organize the images by room and by trade for future reference.
What happens if a defect is found after the walls are already closed?
When a concealed defect is discovered after drywall is installed, reaching it typically requires opening the finished wall, removing insulation, completing the repair, and then restoring the surface. This is considerably more disruptive and costly than addressing the same defect during the pre-cover phase — which is the central reason thorough verification before wall closure matters as much as it does.
How does a fire rebuild affect the pre-cover inspection process?
Fire damage rebuilds tend to be more involved than standard new construction because they may include partial demolition, remediation of fire- and smoke-affected materials, reconstruction over existing foundations or partial structures, updated code requirements, Title 24 energy compliance documentation, and coordination with active insurance claims. These factors introduce additional inspection steps, documentation requirements, and coordination demands that make the pre-cover checkpoint especially consequential.
Can I do this inspection myself or do I need a professional?
Homeowners are welcome to observe and photograph the pre-cover phase, and requesting a walkthrough is a reasonable thing to ask of the project team. Evaluating structural connections, code compliance, MEP installation quality, and waterproofing details, however, requires professional training and field experience. The building department inspection provides a professional code review, and a third-party independent inspection adds another professional perspective. A homeowner's direct observation is a useful complement to these reviews, but it is not a replacement for them.
The Work Behind the Walls Is What Matters Most
A finished home can present beautifully and still carry problems behind the walls. The quality of the framing, the integrity of the plumbing and electrical installations, the performance of the building envelope, and the completeness of the insulation and air sealing — these are the factors that determine whether the home is safe, durable, and efficient over the long term.
For homeowners in Altadena and Pacific Palisades who are rebuilding after wildfire, the pre-cover phase is the point at which that quality is established and confirmed. It is the last clear opportunity to observe the work, document it, address any deficiencies, and move forward with confidence that what goes behind the walls was done correctly.
If you are planning or managing a fire damage rebuild and want to understand how 1st Choice Development coordinates the pre-cover quality process as part of a structured reconstruction operation, schedule a rebuild consultation at 1stchoicedevelopment.com.
Questions about your rebuild?
We rebuild fire-damaged homes across Altadena and Pacific Palisades, and we are happy to talk through your situation.
Talk to us