How to Verify Waterproofing Was Installed Correctly Before Finishes Cover the Work
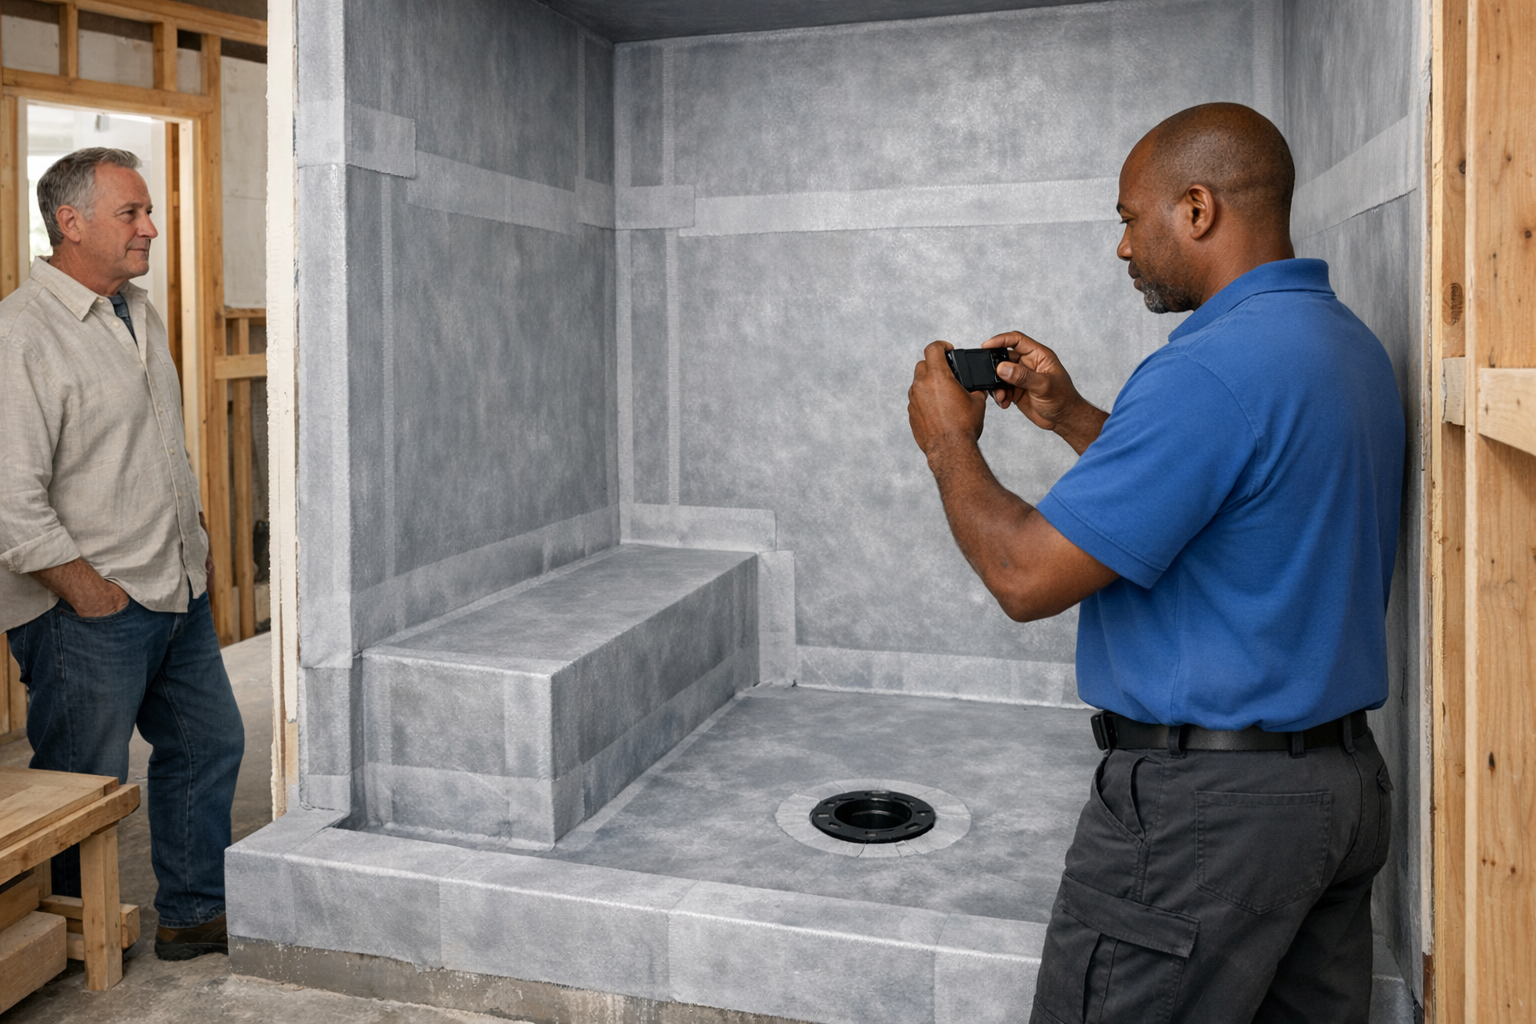
How to Verify Waterproofing Was Installed Correctly Before Finishes Cover the Work
The only reliable way to confirm waterproofing was installed correctly is to inspect it, test it, and document it before tile, drywall, flooring, or any other finish material covers it permanently. Once finishes go on, most waterproofing defects become invisible — and they stay invisible until water finds a path through. By that point, the cost and disruption of fixing the problem are far greater than addressing it before the work was covered.
If you are rebuilding a home after fire damage in Altadena or Pacific Palisades, this verification window carries extra weight. In a full reconstruction, every layer of the building envelope is new — foundation, framing, sheathing, rough MEP systems, waterproofing, and finishes. That sequence creates a clear, one-time opportunity to verify each layer before the next one conceals it. Waterproofing is among the most consequential layers to confirm, because failures behind walls, beneath showers, and around penetrations can cause serious damage that may take months or years to become apparent.
This article walks through four verification steps every homeowner should understand before authorizing finishes: visual inspection, water testing, thickness and cure confirmation, and documentation. It also clarifies what building inspections cover, where their limits are, and which warning signs should halt the work.
Why Waterproofing Verification Carries More Weight in a Full Rebuild
In a standard bathroom remodel or targeted repair, some existing waterproofing may remain in place, limiting what needs to be verified to the new scope of work. In a fire reconstruction — where the structure is being built from the ground up — every waterproofing installation is new. Showers, tub surrounds, exterior wall transitions, window flashings, roof-to-wall connections, balcony surfaces, and below-grade areas all require waterproofing that was not there before the rebuild began.
This creates both a challenge and an opportunity. The challenge is the sheer number of areas requiring verification and the coordination that demands between trades. The opportunity is that everything remains exposed and accessible before finishes are applied. In a fire rebuild, homeowners have direct visibility into work that is typically hidden during a conventional renovation.
Approaching waterproofing verification as a defined project milestone — rather than an informal walkthrough — protects the homeowner's investment, supports insurance documentation requirements, preserves warranty eligibility, and reduces the likelihood of expensive corrections after move-in.
Step 1: Visual Inspection Before Any Finishes Go On
Before tile, drywall, flooring, or cladding is installed over a waterproofed area, the waterproofing itself should be visually examined. This inspection confirms whether the membrane or coating was applied correctly, completely, and without defects that could allow water to pass through.
What Complete Membrane Coverage Looks Like
A properly installed waterproofing membrane — whether liquid-applied, sheet membrane, or another system — should show consistent coverage across the entire protected surface. Key indicators to look for:
- Uniform color and thickness across the full surface area, with no thin spots, bare patches, or skipped sections
- No pinholes, bubbles, blisters, or tears anywhere in the membrane
- Complete coverage over fastener heads, screw penetrations, and substrate seams
- Clean, continuous transitions between horizontal and vertical surfaces
A liquid-applied product should appear uniform and fully cured across every coated surface. A sheet membrane should have seams that are fully sealed and bonded, with no lifting, wrinkling, or gaps along any edge.
High-Risk Areas That Deserve the Closest Attention
Waterproofing failures rarely originate in the center of a flat, open surface. They tend to begin at transitions, corners, penetrations, and connections — locations where materials meet or where the membrane must change direction. These areas require the most careful review:
- Wall-to-floor corners and inside corners — reinforcement fabric or tape should be fully embedded in the membrane at every change of plane
- Pipe penetrations, valve bodies, and mixing valves — the membrane must seal tightly around every penetration with no gaps
- Shower niche framing and bench edges — these introduce additional corners and transitions that each require complete membrane coverage
- The junction between the shower pan and the curb — water concentrates here during use, and any gap in coverage can allow moisture to migrate behind the tile
- Window and door rough openings on exterior walls — flashing and waterproofing integration must be continuous and correctly lapped at every edge
The Drain Connection
The drain is one of the most critical details in any shower or wet-area waterproofing installation. The membrane must integrate fully with the drain flange or clamping ring, leaving no visible gap between the membrane and the drain body. The connection should be secure, sealed in accordance with the manufacturer's requirements, and positioned so water flows toward the drain rather than pooling around it or draining away from it.
A drain that appears intact from above but is not properly bonded to the membrane beneath can allow water to travel under the tile assembly and into the framing below. This is among the most frequently seen sources of concealed moisture damage in shower installations.
Step 2: The Flood Test and What It Actually Confirms
A flood test — sometimes called a water test or pan test — is one of the most direct methods for verifying that a horizontal waterproofed surface and its drain connection are retaining water as designed. It is most commonly applied to shower pans, and may also be relevant to balcony surfaces, roof decks, or other horizontal waterproofed areas depending on the installation type and local requirements.
How a Flood Test Is Conducted
- Plug the drain using an appropriate test plug that creates a watertight seal at the drain opening
- Fill the area with water to the depth specified by the manufacturer's instructions or the applicable code — for shower pans, this is typically one to two inches above the drain
- Mark the water level clearly at the beginning of the test and record the exact start time
- Allow the water to remain in place for the required duration — 24 hours is a common standard, though the specific period should be confirmed against the manufacturer's instructions and your building department's requirements
- Check the area below and any adjacent spaces during and after the test for any signs of moisture, dripping, staining, or seepage
- Photograph the setup, the initial water level, and the final result — this documentation becomes part of the permanent project record
What a Flood Test Confirms — and Where It Falls Short
A passing flood test confirms that the horizontal pan surface and the drain connection are watertight under static water conditions. That is meaningful and important information to have on record.
However, a flood test does not verify every aspect of the waterproofing installation. Understanding these boundaries matters:
- A flood test does not evaluate vertical surfaces — shower walls, curb faces above the waterline, and wall-to-ceiling transitions are not submerged and must be confirmed through visual inspection
- A flood test does not cover pipe penetrations above the waterline — valve bodies, showerhead connections, and niche openings higher on the wall are not reached by the test water
- A flood test does not replicate dynamic water conditions — it evaluates standing water, not the splashing, running, and spraying that occurs during normal use
This is why a flood test on its own is not a complete verification. Visual inspection of walls, corners, penetrations, and transitions is a distinct and equally necessary step.
Step 3: Thickness and Cure Verification for Liquid-Applied Membranes
When the waterproofing system is a liquid-applied product — which is common in shower and wet-area applications — two additional factors affect performance and cannot be confirmed through visual inspection alone.
Membrane thickness. A liquid-applied membrane can appear fully coated on the surface while still being too thin to perform as specified. Manufacturers define a minimum dry-film or wet-film thickness, and meeting that threshold is what determines whether the membrane will hold up against water intrusion over time. During application, a contractor can use a wet-film thickness gauge to verify that each coat reaches the manufacturer's required minimum. It is reasonable to ask whether this measurement was taken and whether the required number of coats was completed.
Cure time. Liquid-applied membranes require a defined cure period before they can be tested or covered with finish materials. Placing tile or other finishes over a membrane that has not fully cured can compromise both the bond and the waterproofing performance. The required cure time depends on the specific product, the number of coats applied, ambient temperature, humidity levels, and ventilation. The manufacturer's technical data sheet outlines the conditions that must be met. Confirming that the cure period was observed before any testing or finish work begins is an important step.
Sheet membranes call for a different verification approach — seam integrity, bonding adhesion, and correct overlap at joints are the primary concerns, rather than thickness and cure time. The manufacturer's installation instructions define what a correct installation looks like for each product type.
Step 4: Documentation Before Authorizing Finishes
Verification that lives only in someone's recollection is not reliable verification. Before finishes go on over any waterproofed area, the homeowner should hold documentation confirming that the work was inspected and found acceptable.
A thorough waterproofing verification record typically includes:
- Photographs of the waterproofed area taken before any finishes are applied — capturing the membrane, corners, penetrations, drain connection, and reinforcement details
- The manufacturer's product data sheet for the waterproofing system used, confirming the product name, application method, required thickness, and cure time
- A written record of the flood test — noting the date, duration, water depth, and result
- Any required building department inspection sign-off applicable to waterproofing at this stage of the construction sequence
- Notes on any deficiencies that were identified, corrected, and re-verified before the area was approved for finishes
Why Documentation Carries Additional Importance in a Fire Reconstruction
In a fire rebuild, documentation serves purposes that extend well beyond standard quality control. Insurance carriers may require evidence that specific work was performed correctly as part of the claim and reimbursement process. Manufacturer warranties may depend on documented proof of proper installation. Future maintenance, remodeling, or resale can benefit from a clear record of what was installed behind the finishes and when it was verified.
Building documentation into the standard workflow — rather than treating it as an optional add-on — protects the homeowner over the long term. Taking photographs and maintaining records before finishes go on costs very little. Not having those records when a question surfaces later can be considerably more expensive.
The Difference Between a Building Inspection and a Contractor Quality Check
Homeowners sometimes assume that a passed building inspection means every aspect of the installation has been evaluated against the highest possible standard. That assumption can create confusion about what was actually reviewed and by whom.
A building department inspection confirms that the work meets code requirements at a defined point in the construction sequence. The inspector evaluates compliance with the applicable building code — in California, this includes the California Building Code and related standards. The scope, depth, and duration of any given inspection vary by jurisdiction and inspector. A passed inspection means the work met code at the time it was reviewed. It does not function as a warranty, a guarantee of long-term performance, or a comprehensive evaluation of every installation detail.
A contractor quality control check is a separate process. This is where the contractor — or the contractor's internal quality control system — confirms that the installation meets the manufacturer's specific requirements, the project specifications, and the contractor's own workmanship standards. This check is often more detailed than the building inspection, because it measures the work against the manufacturer's installation instructions rather than minimum code thresholds.
Both processes serve important functions. Neither replaces the other. In a fire reconstruction, both should occur before waterproofing is covered by finishes. If there is any uncertainty about what your jurisdiction requires or what your contractor's quality control process includes, asking directly is a reasonable and appropriate step.
Warning Signs That Should Halt the Work Before Finishes Proceed
If any of the following conditions are present, finishes should not move forward until the issue has been identified, corrected, and re-verified:
- Exposed or unsealed seams, corners, or penetrations — any location where the membrane is not continuous or fully adhered
- Visible pinholes, blisters, tears, or areas of peeling in the membrane surface
- Gaps between the membrane and the drain body, or a clamping ring that is not correctly seated
- No indication that the required cure time was observed — if finishes or testing are being scheduled immediately after application without the manufacturer's specified cure period having elapsed
- Missing or incompatible drain components — mismatched parts, field-improvised connections, or components from different manufacturers that were not engineered to work together
- No flood test completed on a horizontal surface where one is required
- Pressure to proceed to finishes before verification is finished — if anyone on the project is pushing to cover waterproofing before it has been properly inspected, tested, and documented, that is a reason to pause and ask questions
Finding a problem before finishes go on is not a setback. It is the verification process doing exactly what it is supposed to do. Corrections made at this stage are straightforward compared to the disruption of uncovering a concealed waterproofing failure months or years after the home is occupied.
How 1st Choice Development Manages Waterproofing Verification in a Fire Rebuild
At 1st Choice Development, waterproofing verification is treated as a defined milestone in the reconstruction sequence — not a routine step on the way to tile installation. Nothing gets covered until it has been inspected, tested where applicable, documented, and confirmed ready for the next phase of work.
This approach is part of a broader project control system that tracks, documents, and verifies each phase of the rebuild. From site setup and grading through foundation, framing, rough MEP, waterproofing, finishes, final inspections, and owner orientation, the same principle holds: each layer of work is confirmed before the next layer conceals it.
For waterproofing specifically, this means photographs are taken before finishes proceed, flood tests are recorded with dates and results, any deficiencies are tracked and re-verified after correction, and the homeowner receives a clear record of what was installed and confirmed at each stage. Subcontractor coordination, inspection scheduling, and manufacturer requirement compliance are managed as documented elements of the construction process.
This standard of field management and documentation is what distinguishes a controlled reconstruction from a loosely coordinated sequence of trades. For homeowners in Altadena and Pacific Palisades rebuilding after wildfire damage, it provides verified, documented confidence in the work behind the walls — confidence that holds long after the finishes look complete.
If you have questions about how waterproofing verification fits into a broader fire reconstruction process — or about any phase of the rebuild — the right next step is a direct conversation. Project-specific requirements vary based on the property, the scope, the jurisdiction, and the approvals involved.
Frequently Asked Questions
How long does a flood test take?
The required duration depends on the manufacturer's specifications and local code. For shower pan flood tests, 24 hours is a commonly cited standard, but the specific requirement for any given project should be confirmed with your contractor, the waterproofing manufacturer's instructions, and your local building department.
Can tile be installed the same day the waterproofing is applied?
Generally, no. Liquid-applied waterproofing membranes require a defined cure period before tile or other finish materials can be applied over them. The required time varies by product, number of coats, and site conditions including temperature and humidity. The manufacturer's technical data sheet specifies what is required. Covering a membrane before it has fully cured can compromise the waterproofing system's integrity.
What happens if the flood test fails?
If a flood test reveals water loss, seepage, or moisture in the area below the pan, the source of the failure must be located and repaired. Once the repair is complete, the area should be re-tested and re-documented before any finishes proceed. A failed flood test identified before tile is installed is a manageable correction. The same failure found after finishes are in place requires significantly more disruptive and costly remediation.
Does a building inspection cover waterproofing quality?
A building inspection confirms code compliance at the applicable stage of construction. It does not necessarily evaluate every installation detail against the manufacturer's specific requirements. A building inspection and a contractor quality control check serve distinct purposes, and both contribute to a complete verification process. Confirming what your jurisdiction specifically requires is best done directly with your contractor and building department.
Who should be present during the flood test?
At a minimum, the contractor or a designated representative should set up, monitor, and document the flood test. If a building department inspection is required at this stage, the inspector will need to observe or confirm the result. Homeowners are encouraged to ask about the timing and outcome. Your contractor should be able to walk through the process, share the documentation, and answer questions about what the test confirmed.
What records should I have before finishes go on over waterproofing?
At a minimum, you should have photographs of the waterproofed area taken before finishes were installed, the manufacturer's product data sheet for the system used, a written record of any flood test performed, and confirmation that required building department inspections were completed. These records support your warranty coverage, your insurance documentation, and your long-term confidence in what is behind the walls.
The Verification Window Is Finite — Use It Deliberately
In a fire reconstruction, the opportunity to verify waterproofing is real but time-limited. Once tile, drywall, flooring, or cladding is installed, the membrane is concealed — and it remains concealed for the life of the finish material. The time to inspect, test, document, and confirm is before the next phase of work begins.
If you are rebuilding after wildfire damage in Altadena or Pacific Palisades and want to understand how waterproofing verification fits into the broader reconstruction process, schedule a rebuild consultation with 1st Choice Development. Every project has specific requirements based on the property, the scope, the jurisdiction, and the approvals involved — and the right process starts with a clear conversation about what your rebuild needs.
Questions about your rebuild?
We rebuild fire-damaged homes across Altadena and Pacific Palisades, and we are happy to talk through your situation.
Talk to us