What to Look for During a Framing Walkthrough Before Your Fire Rebuild Walls Close
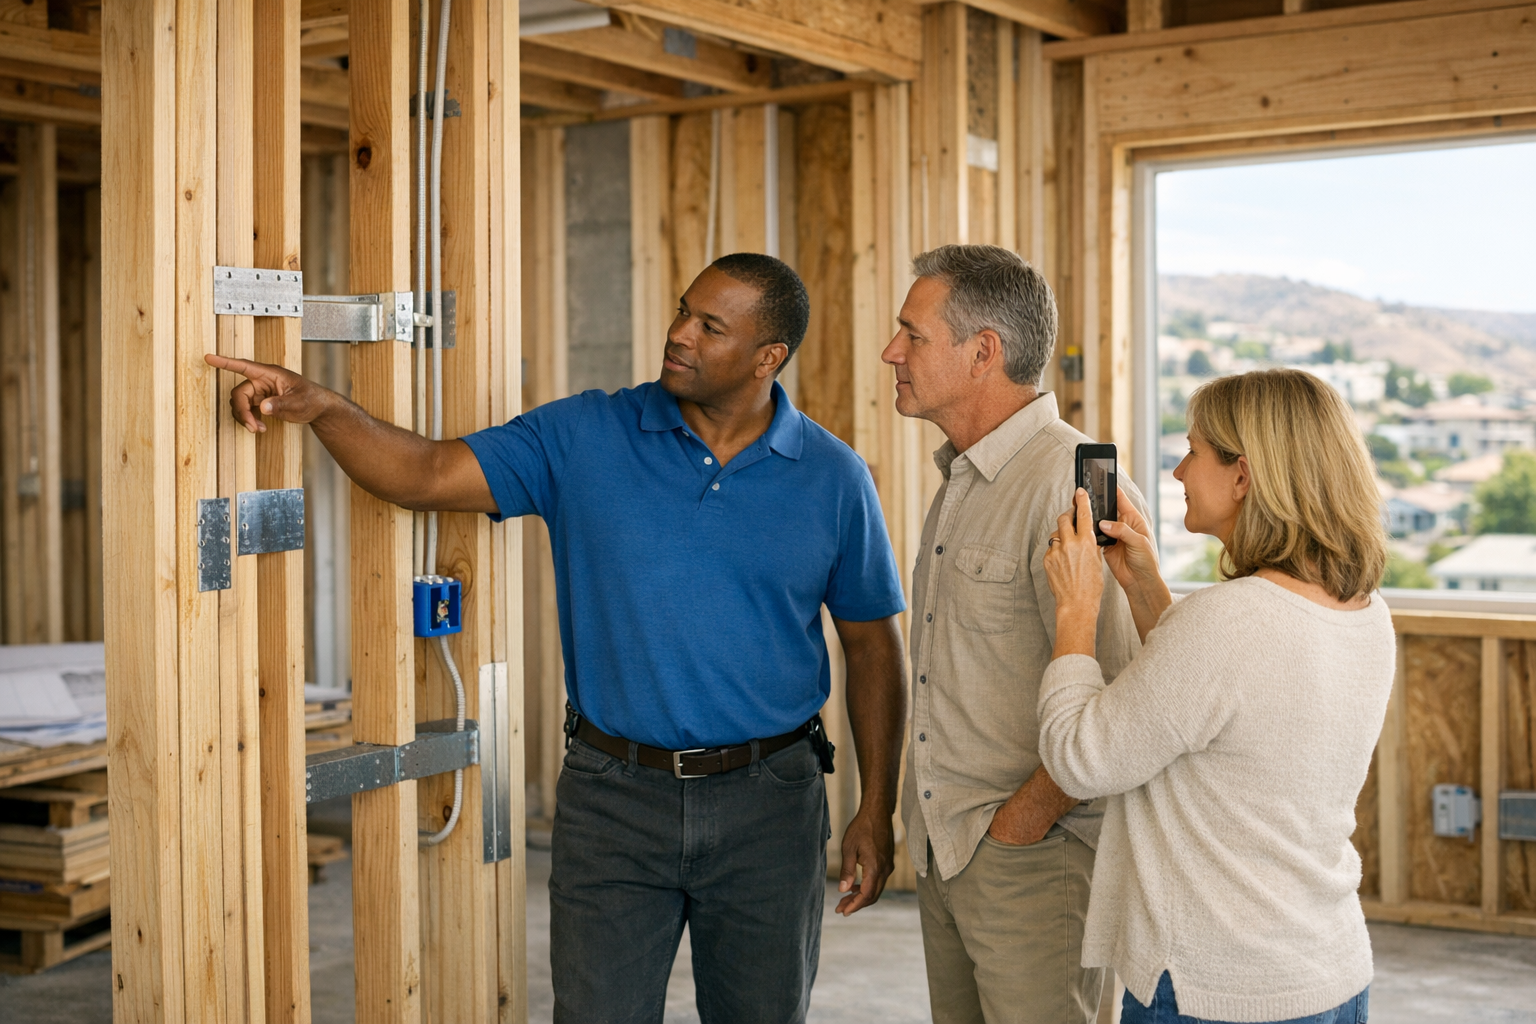
What to Look for During a Framing Walkthrough Before Your Fire Rebuild Walls Close
A framing walkthrough is your last clear opportunity to see the structural skeleton of your rebuilt home before insulation and drywall cover it permanently. During this walkthrough, you should verify that framing members are plumb, level, and square, that rough openings match approved plans, that mechanical, electrical, and plumbing rough-ins are correctly placed, that required blocking and backing are installed, that fire-rated assemblies and connection hardware are in place, and that everything visible matches the approved construction documents.
If you are rebuilding after a wildfire in Altadena or Pacific Palisades, this stage carries additional weight. Your rebuild likely involves updated California building code requirements, new structural connections, fire-hardened assemblies, and insurance documentation needs that did not exist when the original home was built. Understanding what to look for during this walkthrough helps you participate meaningfully, ask informed questions, and build confidence that the work behind the walls is being done correctly.
This guide walks through each category of what to observe, what to ask, and what to document during a framing walkthrough on a fire damage reconstruction project.
What a Framing Walkthrough Is and When It Happens
A framing walkthrough takes place after structural framing is complete and after rough mechanical, electrical, and plumbing systems have been installed, but before insulation and drywall go up. Some builders call this a pre-drywall walkthrough. The timing matters because once walls are closed, the framing, connections, rough-ins, blocking, and fire-rated assemblies become inaccessible without destructive investigation.
In a fire rebuild, there are typically two distinct events at this stage that serve different purposes:
- The building department framing inspection is a required code compliance check conducted by a municipal inspector. The inspector verifies that the structural work meets the approved plans and applicable building codes. This inspection must pass before insulation and drywall can proceed.
- The homeowner framing walkthrough is your opportunity to walk the structure with your contractor or superintendent, verify that the layout matches what you approved, confirm that backing and blocking are installed where needed, and document the condition of the framing and rough-ins with photographs before everything is covered.
These are two different events. The building department inspection confirms code compliance. Your walkthrough confirms that the home is being built the way you expect, and it creates a photographic record of what is behind the walls. Both matter. In a fire rebuild where insurance documentation, updated code requirements, and structural replacements are all in play, your walkthrough is especially valuable.
What to Bring to the Framing Walkthrough
Preparation makes the walkthrough more productive. Bring the following:
- Approved architectural and structural plans, including any approved change orders or revisions. These are your reference for verifying room dimensions, wall locations, window and door openings, and structural details.
- Appliance, cabinet, window, and plumbing fixture specifications, so you can confirm that rough openings, electrical outlet placement, plumbing stub-out locations, and blocking positions match the fixtures that will be installed later.
- A tape measure and a torpedo level. A tape measure lets you verify room dimensions and rough opening sizes. A torpedo level lets you spot obvious framing members that are out of plumb or level.
- Your phone for photographs and video. You will want to document the framing, rough-ins, connections, blocking, and any areas of concern. These images become part of your permanent record of what is behind the walls.
- A notepad or printed checklist for recording observations, questions, and anything that needs follow-up.
- Your insurance adjuster's approved scope of work, if your rebuild is insurance-funded. Having this on hand allows you to confirm that the structural work being documented aligns with the approved scope, which can matter during insurance closeout.
Structural Framing: What to Observe in the Skeleton of the House
Plumb, Level, and Square
Walls should be plumb, meaning perfectly vertical. Floors should be level. Corners should be square. These three conditions affect everything that comes after: drywall finishing, cabinet installation, door and window operation, tile work, and countertop fitting.
What to look for: use your torpedo level against wall studs and door frames. Look down the length of walls for bowing or waviness. Check corners with a tape measure by measuring diagonals. If the two diagonal measurements in a room are equal, the room is square. If they differ, the room is out of square, and the further apart those numbers are, the more noticeable the problem will be when finishes are installed.
When framing is out of plumb or square, doors may stick or swing open on their own, tiles may require excessive cuts or lippage adjustments, and cabinets may not sit flush against walls. These are problems that become permanent once drywall is installed over them.
Stud Spacing and Header Sizing
Wall studs are typically spaced at sixteen inches on center for load-bearing walls. Some non-load-bearing walls or specific energy-code-compliant framing designs may use twenty-four-inch spacing. Your approved structural plans specify the required spacing.
Headers span the top of window and door openings and carry the load above those openings down to the supporting structure. Header sizing is determined by the structural engineer based on span, load, and the specific conditions of your rebuild. Undersized headers can lead to sagging above openings, cracked drywall, and doors or windows that bind.
What to look for: check that stud spacing is consistent and matches the plans. Verify that headers above openings are the correct size and material specified in the structural drawings. In a fire rebuild, structural members may include engineered lumber products that differ from the original home's framing. This is normal and often reflects updated code requirements or structural engineering decisions specific to your project.
Load-Bearing Walls and Point Loads
Load-bearing walls carry the weight of the structure above them down to the foundation. Point loads concentrate weight at specific locations, such as where a beam sits on a post. These elements must be supported continuously from the roof through the walls to the foundation.
What to look for: verify that posts and beams align with the structural plans. Look for continuous load paths where beams bear on posts and posts bear on proper footings. If your rebuild includes a different floor plan than the original home, the load-bearing wall locations may have changed, and this is one of the most important things to verify against the approved structural plans.
Anchor Bolts, Sill Plates, and Foundation Connections
The sill plate is the bottom horizontal member that sits on top of the foundation. It is typically pressure-treated lumber. Anchor bolts or hold-down brackets connect the sill plate to the foundation, and these connections are critical for seismic and wind resistance.
What to look for: verify that anchor bolts are present and properly spaced. Confirm that sill plates are pressure-treated. Look for sill seal gasket material between the sill plate and the foundation, which helps with moisture and air infiltration. In a fire rebuild in Altadena or Pacific Palisades, seismic connection hardware is especially important. Simpson connectors, hold-downs, and straps may be more extensive than what the original home had, reflecting current California seismic code requirements.
Roof Framing, Trusses, and Bracing
Roof framing carries the weight of the roofing materials, distributes wind and seismic loads, and defines the shape of the ceiling and attic space. Trusses are factory-engineered assemblies, while stick-framed roofs are built on site with individual rafters, ridge boards, and collar ties.
What to look for: verify that truss plates are fully seated and not pulled away from the wood. Check that bracing is installed where the structural plans require it. Look for hurricane ties or seismic straps connecting the roof framing to the wall framing below. Confirm that the roof framing matches the approved plans in terms of pitch, overhang, and any structural changes from the original home.
In a fire rebuild, trusses are typically replaced entirely rather than repaired. Confirm that the installed trusses match the engineered truss drawings, which should be available on site or from your contractor.
Mechanical, Electrical, and Plumbing Rough-Ins
Before insulation and drywall are installed, all rough plumbing, electrical wiring, and HVAC ductwork must be in place. These systems run through the framing, and how they interact with the structural members matters for both code compliance and long-term performance.
Plumbing Stub-Outs and Drain Slopes
Plumbing rough-in includes water supply lines and drain, waste, and vent piping. Drain lines must slope correctly to function. Supply lines must reach the correct locations for sinks, toilets, showers, tubs, dishwashers, refrigerators, and laundry connections.
What to look for: verify that stub-out locations match the fixture layout shown on the plans. Ask whether the plumbing has been pressure tested. Look for proper support and fastening of pipes. If you are rebuilding with a different bathroom or kitchen layout than the original home, confirm that the new plumbing locations match the approved plans exactly.
Electrical Box Placement, Wire Routing, and Dedicated Circuits
Electrical rough-in includes outlet boxes, switch boxes, lighting boxes, and the wiring that connects them to the panel. The placement of every box affects the usability of the finished room.
What to look for: check outlet and switch box locations against the electrical plan. Think about where furniture, doors, and appliances will sit. An outlet hidden behind a door or blocked by a bed is difficult and expensive to move after drywall. Verify that dedicated circuits are run where required, such as for the kitchen, bathrooms, laundry, HVAC equipment, and garage. Confirm that exterior outlet and lighting box locations make sense for the home's exterior layout.
This is one of the most practical parts of the walkthrough for a homeowner. Walk each room as if you are using it. Where will you plug in a lamp? Where will you flip the light switch when you enter the room? Where will the range hood exhaust? These are easier to adjust now than after drywall.
HVAC Duct Runs, Boot Locations, and Clearances
Heating, ventilation, and air conditioning ductwork is routed through the framing during the rough-in phase. The location of supply boots and return air openings affects comfort, noise, and furniture placement in the finished rooms.
What to look for: verify that duct boot locations match the plans. Check that ducts are not kinked or excessively compressed, which restricts airflow. Ask about equipment location and whether the system is sized correctly for the rebuilt home. In a fire rebuild, the HVAC system is typically replaced entirely, and the new system may be designed to meet current California Title 24 energy efficiency requirements, which may differ from what the original home had.
Notching and Boring: When Trades Cut Through Framing
Plumbers, electricians, and HVAC contractors must sometimes cut, notch, or bore through framing members to route pipes, wires, and ducts. Building codes set strict limits on how much of a stud, joist, or rafter can be cut before the structural integrity is compromised.
What to look for: look for studs or joists that have been excessively notched, bored, or cut. A properly bored hole in the center of a stud is generally acceptable within code limits. A large notch cut into the edge of a joist or a hole bored too close to the edge of a structural member can weaken the framing. If something looks excessive, ask your contractor about it. This is also something the building department framing inspector will review.
Nail Plates: Where They Are Required and Why
Nail plates, sometimes called strike plates or safety plates, are small metal guards installed on framing members where wires or pipes pass close to the surface of the stud. They prevent drywall screws and nails from puncturing a wire or pipe after the wall is closed.
What to look for: anywhere you see a wire or pipe passing through or along a stud or joist within the code-specified distance of the face of the framing member, there should be a nail plate. Missing nail plates are a common punch-list item and can be a failed inspection point. They are inexpensive to install now and very expensive to address later if a drywall screw punctures a water line or electrical wire inside a finished wall.
Layout, Dimensions, and Openings
Verifying Room Dimensions Against the Approved Plans
Measure key rooms and compare the dimensions to the approved architectural plans. This is especially important in a fire rebuild where the floor plan may have changed from the original home, or where the rebuilding process involved changes from the initial design.
What to look for: measure room widths, lengths, and hallway widths. Check that closet dimensions match the plans. Verify that bathroom and kitchen dimensions will accommodate the cabinets, fixtures, and appliances specified in the design. Dimensional errors in framing become permanent problems in finishes.
Door and Window Rough Openings
Rough openings are the framed openings in the walls that receive doors and windows. Each rough opening must be sized correctly for the specific door or window unit that will be installed, and it must be square and level.
What to look for: verify rough opening dimensions against the door and window schedule on the plans. Check that openings are square by measuring diagonals. Verify header height and sill height. If windows were upgraded or resized as part of the rebuild, confirm that the rough openings match the new window specifications, not the old ones.
Wall Squareness in Tile Areas
In kitchens and bathrooms where tile will be installed, wall squareness and plumb are especially critical. Out-of-square walls create visible problems in tile layout, particularly at inside corners, where cuts become uneven and grout lines do not align.
What to look for: check walls in shower surrounds, behind bathtubs, and behind kitchen backsplash areas for plumb and square. If these walls are out, the tile installer will face compromises that affect the finished appearance.
Electrical Outlet Placement Relative to Door Swings and Furniture
This is a practical consideration rather than a structural one, but the framing walkthrough is the right time to catch it. Outlet and switch placement should make sense for how the room will actually be used.
What to look for: visualize door swings. A light switch placed behind a door when it opens is frustrating to use. Visualize furniture placement. An outlet behind a headboard or behind a large sofa may not be accessible. These adjustments are relatively simple to make before drywall and very expensive afterward.
Blocking and Backing: What Is Missing Matters as Much as What Is There
Blocking and backing are short pieces of lumber installed between studs or joists to provide a solid attachment point for items that will be mounted to the wall or ceiling after drywall is installed. Without blocking, there is nothing behind the drywall strong enough to support heavy items.
Common locations where blocking should be verified:
- Wall-mounted televisions
- Grab bars in showers and near toilets
- Towel bars and robe hooks
- Heavy mirrors
- Floating vanities and wall-hung cabinetry
- Handrail brackets on stairway walls
- Upper cabinet runs in the kitchen
- Shower glass panel brackets
- Wall-mounted light fixtures with significant weight
Missing blocking is one of the most commonly overlooked items at the framing stage and one of the most expensive to fix after drywall. Adding blocking before drywall costs very little in time and materials. Cutting open a finished wall to add blocking after the home is painted, trimmed, and furnished costs significantly more and creates unnecessary disruption.
In a fire rebuild, blocking locations may differ from the original home because the layout, fixtures, and finishes may have changed. Verify blocking locations against the new design, not from memory of the original house.
Water Protection and Exterior Details
Before the walls are closed, exterior water protection details should be visible and verifiable.
- Window and door flashing: flashing directs water away from the rough openings and prevents it from entering the wall cavity. Proper flashing installation is critical for long-term waterproofing performance.
- House wrap or water-resistive barrier: this layer covers the exterior sheathing and sheds water while allowing moisture vapor to escape from inside the wall cavity. It should be properly lapped, taped, and integrated with the flashing at windows and doors.
- Subfloor drainage provisions: in areas where water may reach the subfloor, such as laundry rooms and bathrooms, drainage provisions may be specified.
In a fire rebuild, updated flashing and waterproofing details may be required by current building code. These details may differ from what the original home had. Your contractor and the building department can confirm what the current requirements are for your specific project.
Fire-Specific Framing Considerations in a Rebuild
If you are rebuilding after a wildfire in Altadena or Pacific Palisades, your framing walkthrough involves considerations that do not apply to a standard new construction project.
- Engineered lumber and structural replacements: fire-damaged structural members are typically replaced in full rather than repaired. Common replacement materials include products such as laminated veneer lumber, wood I-joists, and glue-laminated timber beams. These are standard components in contemporary construction and are selected by the structural engineer based on the load and span conditions of your specific project.
- Fire-rated assemblies: depending on the property's location, lot line proximity, and local fire-hardening requirements, certain walls or ceilings may require fire-rated construction. This can include specific drywall types, layer counts, and assembly methods. These requirements should be documented on the approved plans.
- Fire blocking and draft stopping: fire blocking consists of short pieces of lumber or other approved material installed within wall cavities, soffits, and chases to slow the spread of fire through concealed spaces. Draft stopping serves a similar function in larger concealed areas such as floor-ceiling assemblies. In a fire rebuild, the presence and placement of fire blocking is especially significant.
- California Title 24 energy compliance at the framing stage: the framing stage affects energy code compliance because insulation performance depends on framing configuration, cavity depth, and thermal bridging. Advanced framing techniques, insulated headers, and specific stud spacing may be part of your project's Title 24 compliance strategy. Your energy consultant or architect can confirm the specific requirements.
- Local fire-hardening requirements: Altadena and Pacific Palisades may have local or county requirements related to fire-hardened construction, including ember-resistant vents, non-combustible exterior materials, and ignition-resistant design features. Some of these requirements are visible at the framing stage, such as vent locations and exterior sheathing details.
- Insurance documentation at the framing stage: photographing and recording the structural work before it is covered by insulation and drywall creates a permanent record of what was built. This documentation can support insurance closeout, confirm that the approved scope of work was completed, and serve as a reference for future maintenance, renovations, or warranty claims.
These considerations are project-specific. Your contractor, architect, structural engineer, and local building department are the appropriate sources for confirming what applies to your property.
Verify What Is Missing, Not Just What Is There
Most homeowners approach a framing walkthrough by looking at what has been installed. That is important, but it is equally important to look for what should be there and is not.
Commonly missed items include:
- Backing and blocking for wall-mounted items
- Nail plates where wires or pipes are close to stud faces
- Access panels for plumbing valves, cleanouts, or equipment that will need future servicing
- Outlet or switch boxes in locations required by the plan
- HVAC duct boots in the correct locations
- Fire blocking in wall cavities and chases
- Flashing at window and door rough openings
Missing items at the framing stage are easy and inexpensive to add. Missing items discovered after drywall, paint, and finishes are installed are expensive and disruptive to correct. This is why the walkthrough matters: it is the moment when corrections are simplest.
Questions to Ask Your Builder or Superintendent During the Walkthrough
- Has the building department framing inspection been completed and passed? If not, when is it scheduled?
- Are there any approved changes from the original plans that I should be aware of? Where are the approved change orders documented?
- Have all trade rough-ins been completed and coordinated? Have plumbing, electrical, and HVAC contractors each signed off on their rough-in work?
- Is all required blocking and backing installed? Can we walk through each room and confirm the blocking locations together?
- Are there any known framing corrections or punch-list items still outstanding?
- When is the last opportunity to request minor adjustments before insulation and drywall begin?
- How will the framing and rough-in conditions be documented before they are covered?
- Are there any fire-rated assemblies or special construction requirements on this project that I should understand?
Should You Hire an Independent Inspector for the Framing Walkthrough
An independent third-party inspector can provide an additional set of experienced eyes during the framing stage. This is distinct from the building department framing inspection. The building department inspector verifies code compliance on behalf of the municipality. An independent inspector works on your behalf to evaluate the overall quality and completeness of the work.
An independent inspection can be especially valuable in a fire rebuild for several reasons:
- The project scope is often large, involving full structural replacement, new MEP systems, and updated code requirements.
- The independent inspector's report becomes part of your documentation record, which can support insurance closeout and future reference.
- An experienced third-party inspector may identify items that are technically compliant but could be improved for long-term performance.
Whether to hire an independent inspector is a decision that depends on the scope of your project, your comfort level, and your budget. It is worth discussing with your contractor and, if your rebuild is insurance-funded, with your insurance carrier to understand whether the cost may be reimbursable.
Documenting the Framing Walkthrough
Documentation at this stage creates a permanent record of what is behind the walls. This record serves multiple purposes over time.
What to photograph:
- Every wall from both sides, showing stud spacing, headers, connections, and blocking
- All plumbing rough-in, including supply lines, drain lines, and stub-out locations
- All electrical rough-in, including panel, outlet boxes, switch boxes, and wire routing
- All HVAC rough-in, including equipment location, duct runs, and boot positions
- Foundation connections, anchor bolts, hold-downs, and sill plates
- Roof framing connections, truss plates, hurricane ties, and bracing
- Fire blocking locations within wall cavities and chases
- Window and door rough openings, flashing details, and water-resistive barrier
- Any areas of concern, corrections, or items that were discussed during the walkthrough
Why this matters: years from now, if you need to locate a pipe, wire, or duct for a renovation, repair, or warranty claim, these photographs become invaluable. For insurance-funded rebuilds, this documentation can also support final claim closeout by confirming that the approved scope of work was completed as documented.
Organize your photographs by room and by category. Label them with dates. Store them in a location you can access long after the project is complete.
How 1st Choice Development Manages the Framing Walkthrough Phase
At 1st Choice Development, the framing walkthrough is not an afterthought. It is built into our project control system as a documented quality gate before any wall is closed.
Our approach includes coordinating all trade rough-ins before the walkthrough, conducting internal quality control reviews of framing, connections, blocking, and rough-in placement, walking the structure with the homeowner to verify layout, dimensions, and fixture coordination, photographing and documenting the framing and rough-in conditions as part of the permanent project record, and confirming inspection readiness before the building department framing inspection is scheduled.
For homeowners rebuilding after fire damage in Altadena and Pacific Palisades, this phase is where accountability becomes visible. The framing walkthrough is the moment where you can see the work, ask questions, and confirm that what is being built matches what was approved. Our job is to make sure that when we walk you through the structure, the work is ready to be seen.
This is part of managing the rebuild as one controlled construction operation rather than a loose collection of trades. From site setup through final handoff, every phase is tracked, documented, and verified so that the work behind the walls is as sound as the finishes in front of them.
Frequently Asked Questions
Does framing have to be inspected by the city before drywall can be installed?
Yes. A building department framing inspection is a required step in the construction sequence. The municipal inspector must approve the framing before insulation and drywall can proceed. This inspection verifies code compliance. It is separate from a homeowner walkthrough or independent inspection.
What is the difference between a framing walkthrough and a pre-drywall inspection?
These terms are often used interchangeably. Both refer to the stage after framing and rough-in are complete but before insulation and drywall are installed. A framing walkthrough typically refers to the homeowner walking the structure with the contractor. A pre-drywall inspection may refer to either the homeowner walkthrough or an independent third-party inspection at this stage.
What are nail plates and where are they required?
Nail plates are small metal guards installed on framing members where wires or pipes pass close to the face of the stud or joist. They prevent drywall fasteners from puncturing concealed wires or pipes. They are required by code whenever a wire or pipe passes within the code-specified distance of the face of the framing member. Missing nail plates can cause a failed framing inspection and are a safety concern.
What is blocking and why does it matter?
Blocking consists of short pieces of lumber installed between studs or joists to provide a solid attachment surface for items that will be mounted after drywall. Without blocking, there is no structural support behind the drywall for heavy items like televisions, grab bars, cabinets, or handrails. Blocking must be installed before drywall because adding it afterward requires opening the finished wall.
How long does a framing walkthrough typically take?
A thorough homeowner walkthrough typically takes one to three hours depending on the size of the home and the number of questions that come up. Larger rebuilds or projects with significant layout changes from the original home may take longer. It is worth taking the time to walk every room and verify key details rather than rushing through.
What happens if I find a problem during the framing walkthrough?
Raise any concerns with your contractor or superintendent during the walkthrough. Legitimate framing or rough-in corrections at this stage are typically straightforward and inexpensive to address. Your contractor should document the issue, explain the correction plan, and confirm when the correction has been completed and verified. If a correction affects structural elements, it may need to be reviewed by the structural engineer before proceeding.
Can I request changes after the framing walkthrough?
Minor adjustments such as outlet relocation or additional blocking can often be accommodated before insulation and drywall begin. Larger changes that affect structural framing, plumbing, or electrical routing may require plan revisions, additional engineering review, updated permits, and additional cost. Discuss any desired changes with your contractor as early as possible to understand the implications before the walls are closed.
Conclusion: The Framing Walkthrough Is Your Last Clear View
The framing walkthrough is the moment in your rebuild when the structural skeleton, the rough mechanical and plumbing systems, the connections, the blocking, and the fire-rated assemblies are all visible and verifiable. Once insulation and drywall go up, these systems become hidden for the life of the home.
For homeowners rebuilding after a wildfire in Altadena or Pacific Palisades, this walkthrough is more than a construction milestone. It is an opportunity to see that the work behind the walls is being done correctly, to document conditions for your records and insurance purposes, and to participate in a rebuild that you can trust from the structure outward.
If you are planning or beginning a fire damage rebuild and want a contractor who manages the framing phase with documented quality control, inspection readiness, and homeowner walkthroughs built into the process, schedule a rebuild consultation with 1st Choice Development at 1stchoicedevelopment.com.
Questions about your rebuild?
We rebuild fire-damaged homes across Altadena and Pacific Palisades, and we are happy to talk through your situation.
Talk to us